- Flaskr Test in Katalon Studio
Flaskr Test in Katalon Studio
Here I am going to explain what I have done to test a Blog app using 2 browser windows simultaneously. I used Katalon Studio. I wrote my test scripts in 2 ways; one in the typical Katalon Studio style, another using Page Object Model
This project is meant to be a set of sample codes for myself to develop a large scale test suite in future.
Movie for demonstration
For those who don’t have time, please have a look at the following movie. This shows how my Web UI test works.
Problem to solve
I want to answer to a question raised in the Katalon Forum with a runnable sample code set.
Please imagine. I can create 2 users to be authenticated by the web app. I would open 2 windows of Chrome browsers simultaneously. From each Chrome, I would visit the http://127.0.0.1/ as 2 users each. When a user “Alice” made a post, then another user “Bob” should be able to see the post by Alice in an instant. When Bob made a new post, then soon Alice should be able to see the Bob’s post.
This test scenario — testing a web app with 2 browsers simultaneously — can be extended to business use cases. Suppose that I have an EC site which has dual user interface: Customer UI and Administrator UI. When a user submit an order to purchase some products, then an administrator should be able to see the order in the list of outstanding orders. I want to test both of the Customer UI and the Administrator UI at the same time. My Web UI test should simulate submitting an order in the Customer UI; then my test my test should verify if the order is appearing in the Administrator UI. I want my test to simulate such dual-participants’ interaction.
But how can I open 2 browsers simultaneously in Katalon Studio?
There is a basic problem in Katalon Studio. Using WebUI.openBrowser() keyword, you can not open 2 browsers.
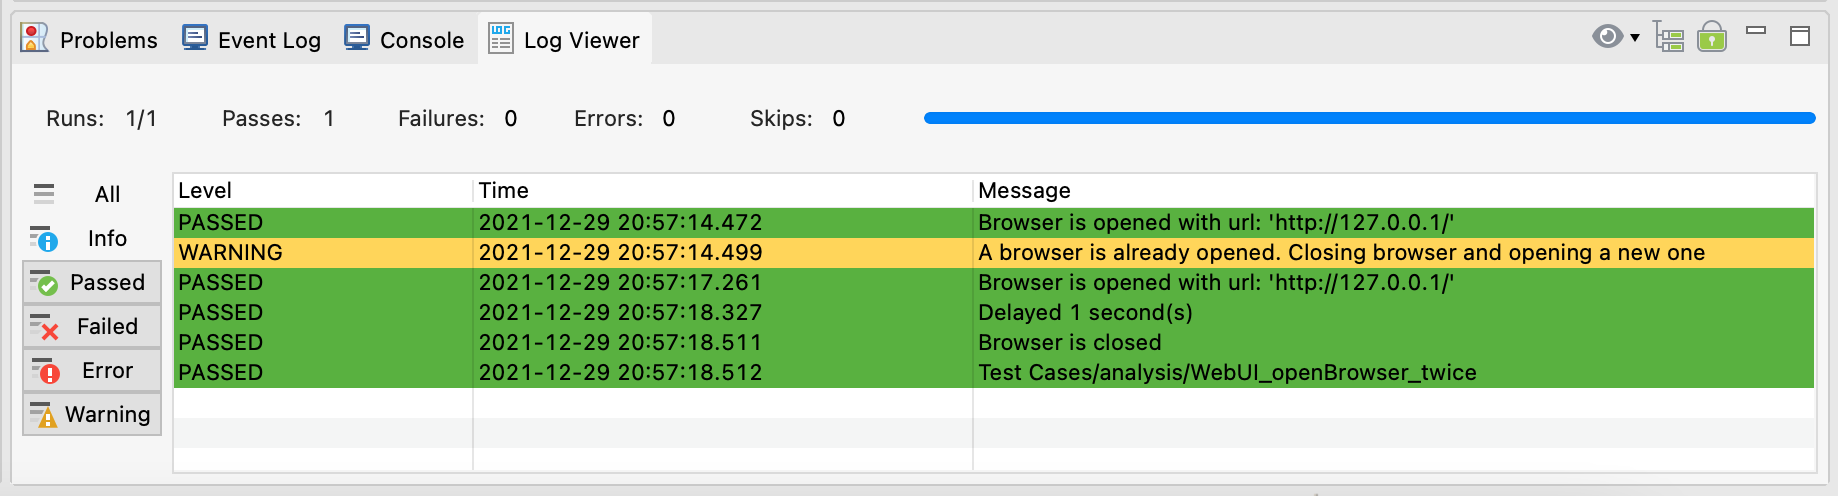
I made a Test Case Test Cases/analysis/WebUI_openBrowser_twice in Katalon Studio to demonstrate this problem.
import com.kms.katalon.core.webui.keyword.WebUiBuiltInKeywords as WebUI

WebUI.openBrowser("http://127.0.0.1/")
WebUI.openBrowser("http://127.0.0.1/")

WebUI.delay(1)
WebUI.closeBrowser()
This simple script calls WebUI.openBrowser() keyword twice. Do we see 2 windows of browsers opened? — No. The 1st window opens but is immediately closed by Katalon Studio before the 2nd window opens.
This way the WebUI.openBrowser() is designed. You can not open 2 browses using this keyword.
Solution
opening browsers by WebDriver API
Behind the WebUI.openBrowser() and other WebUI.xxx keywords , an instance of Selenium WebDriver is working. If I write a script that makes an instances of WebDriver class by calling org.openwa.selenium.chrome.ChromeDriver directly, then I can open a Chrome browser. My script can create 2 instances of WebDriver and keep them running. Then I will have 2 windows of Chrome browser. My test script can talk to them via the WebDriver API such as driver.navigate().to("http://127.0.0.1/").
While opening browsers with WebDriver API, still I want to use WebUI.xxx keywords. There is a pitfall. Katalon’s WebUI.xxx keyword do not work with a browser (a WebDriver instance) that my script instantiated. Let me show you an experiment.
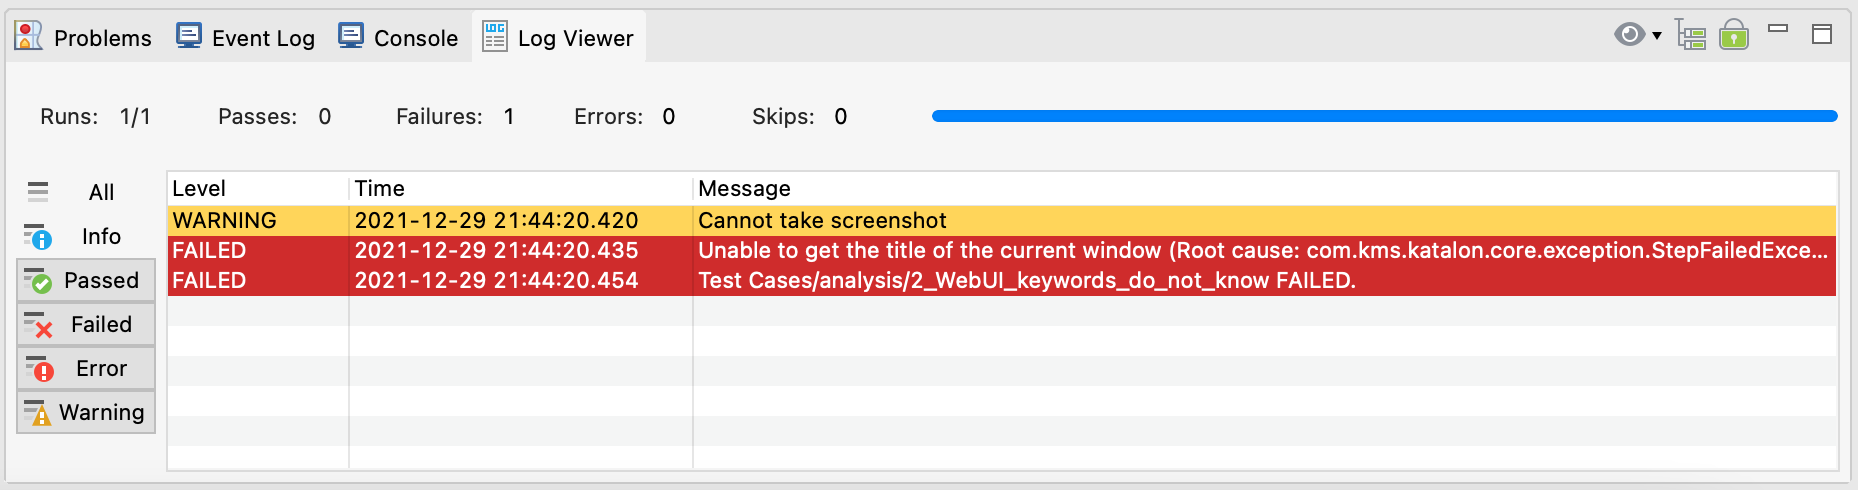
Test Cases/analysis/2_WebUI_keywords_do_not_know
String chrome_executable_path = DriverFactory.getChromeDriverPath()
System.setProperty('webdriver.chrome.driver', chrome_executable_path)

WebDriver browser = new ChromeDriver()
browser.navigate().to('http://127.0.0.1/')

// WebUI.xxx do not know the WebDriver instance created here

String windowTitle = WebUI.getWindowTitle()
assert "Posts - Flaskr" == windowTitle
This script opens a Chrome browser window by calling new ChromeDriver(). But the script does not inform Katalon Studio of the WebDriver instance. WebUI keywords are not aware of the browser. Therefore calling WebUI.getWindowTitle() keyword fails.
informing Katalon Studio of browsers opened by WebDriver API
How to fix this error? — call DriverFactory.changeWebDriver(WebDriver browser).
TestCases/analysis/3_how_to_inform_WebUI_keywords
import org.openqa.selenium.WebDriver
import org.openqa.selenium.chrome.ChromeDriver

import com.kms.katalon.core.webui.driver.DriverFactory
import com.kms.katalon.core.webui.keyword.WebUiBuiltInKeywords as WebUI

String chrome_executable_path = DriverFactory.getChromeDriverPath()
System.setProperty('webdriver.chrome.driver', chrome_executable_path)

WebDriver browser = new ChromeDriver()
browser.navigate().to('http://127.0.0.1/')

// i can let WebUI.xxx keywords know the WebDriver instance created by my script
DriverFactory.changeWebDriver(browser)

String windowTitle = WebUI.getWindowTitle()
assert "Posts - Flaskr" == windowTitle
This code passes.
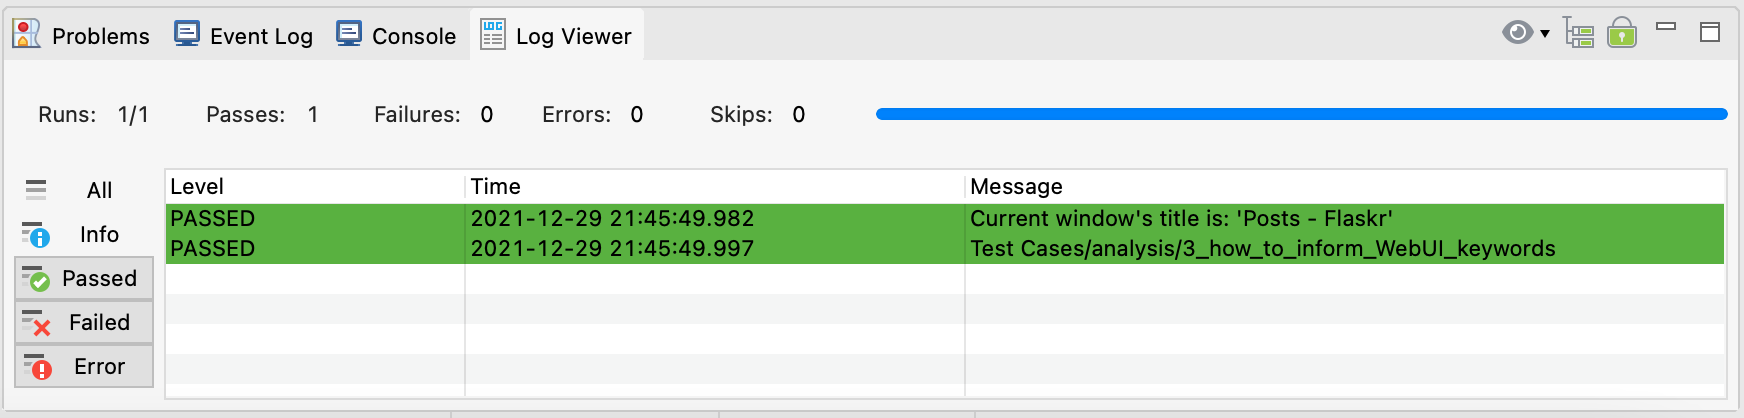
Now WebUI.xxx keywords can interact with the browser which was created by my script using new ChromeDriver() API.
Waiting for the page to load
By a call driver.navigate().to("http://127.0.0.1/"), we can open a browser and let it navigate to the URL specified. But this call does NOT perform implicit wait for the page to load completely. If you want to ensure that the page has been loaded, you need to do it explicitly.
There are several ways of implementing “wait for page to load”. The following sample code shows how to use WebUI.verifyElementPresent(TestObject, int timeout) keyword.
// Test Cases/analysis/4_wait_for_the_page_to_load

import org.openqa.selenium.WebDriver
import org.openqa.selenium.chrome.ChromeDriver

import com.kms.katalon.core.model.FailureHandling
import com.kms.katalon.core.testobject.ConditionType
import com.kms.katalon.core.testobject.TestObject
import com.kms.katalon.core.webui.driver.DriverFactory
import com.kms.katalon.core.webui.keyword.WebUiBuiltInKeywords as WebUI

String chrome_executable_path = DriverFactory.getChromeDriverPath()
System.setProperty('webdriver.chrome.driver', chrome_executable_path)

WebDriver browser = new ChromeDriver()
browser.navigate().to('http://127.0.0.1/')

// i can let WebUI.xxx keywords know the WebDriver instance created by my script
DriverFactory.changeWebDriver(browser)

// wait for the page to load
TestObject tObj = makeTestObject("site_name", "//h1[text()='Flaskr']")
//TestObject tObj = makeTestObject("site_name", "//h1[text()='FlaskR']")   // this will fail
WebUI.verifyElementPresent(tObj, 5, FailureHandling.STOP_ON_FAILURE)

WebUI.closeBrowser()

// helper method to create an instance of TestObject
TestObject makeTestObject(String id, String xpath) {
    TestObject tObj = new TestObject(id)
    tObj.addProperty("xpath", ConditionType.EQUALS, xpath)
    return tObj
}
By the way, as you know, the WebUI.openBrowser(String url) keyword does implicit wait. How is its implicit wait implemented? — You can find the source of the keyword at OpenBrowserKeyword.groovy. You can start reading the source and find its internal implementation. I think that explicit wait by WebUI.verifyElementPresent() keyword is easier in this case to implement, than trying to imitate the implicit wait by WebUI.openBrowser() keyword.
Magic spells for opening 2 browsers
In short, the following is the magic spells you need to know.
-
In Katalon Studio, test script can open 2 browsers by calling
new ChromeDriver()API twice. -
a test script can call
DriverFactory.changeWebDriver(WebDriver)API so thatWebUI.xxxkeywords can interact with the browser which was created by the script.
Application Under Test at a glance
I will use a Web Application named “Flaskr” as a test bed. Flaskr is the sample code presented by “Flask Tutorial”. It is
a basic blog application called Flaskr. Users will be able to register, log in, create posts, and edit or delete their own posts.
I just typed the sample codes as published without any changes, and made a docker image. Later I will describe how to run it on your local PC. Let me go through the screenshots of Flarkr to see what it is.
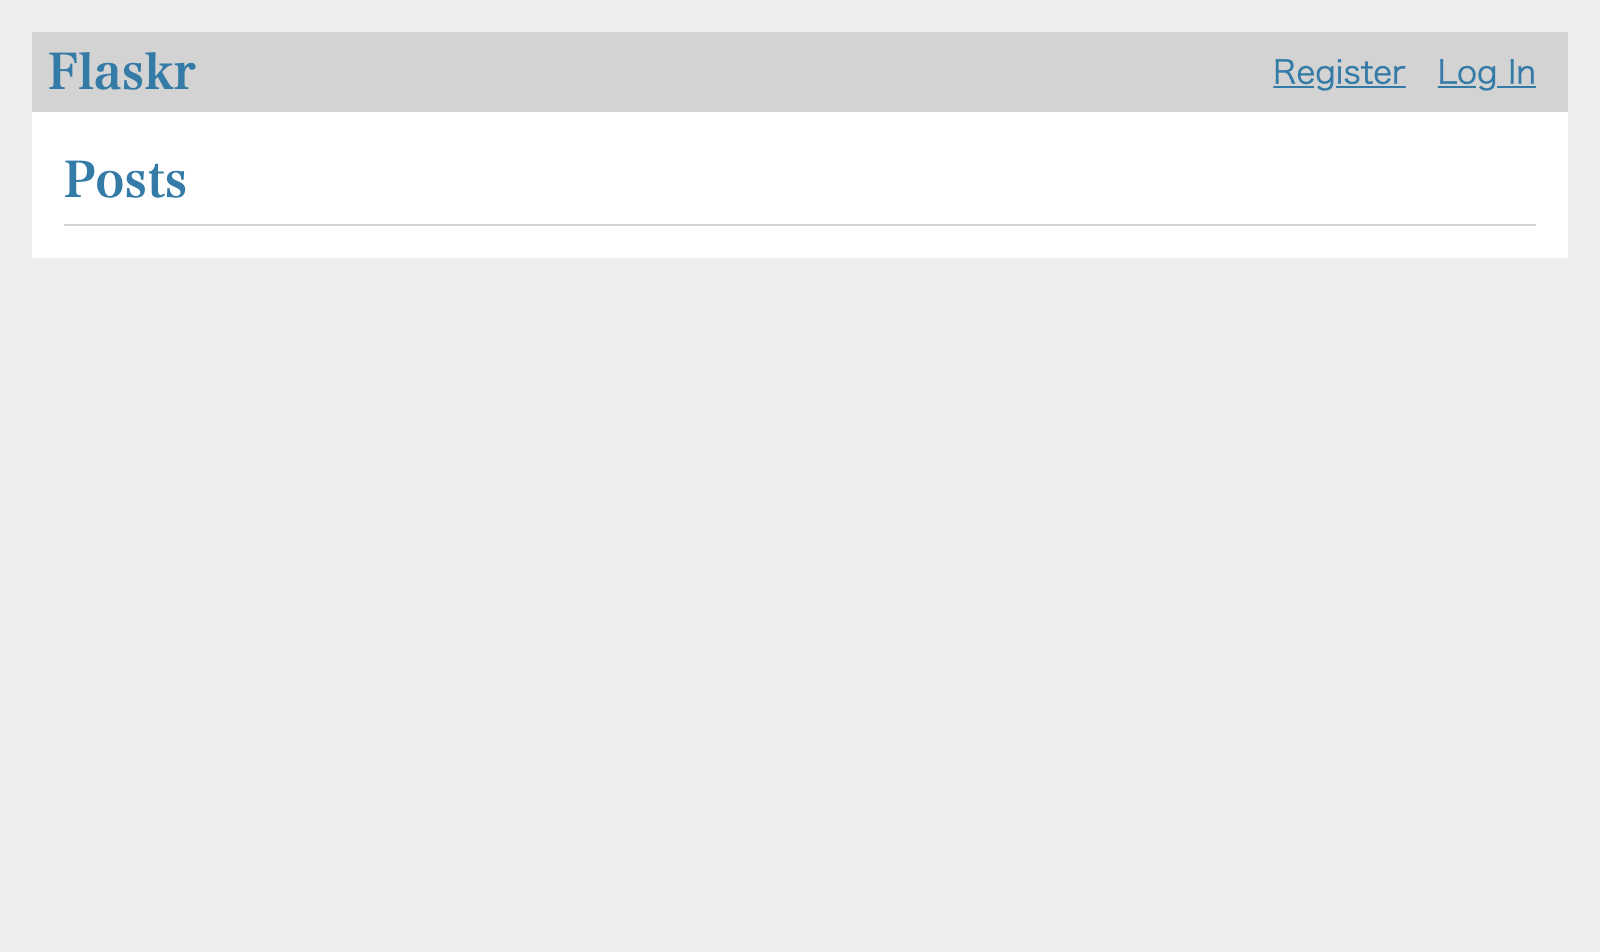
I open Chrome browser to visit the URL of the Application Under Test:
I find the index page as follows, which has no blog posts submitted yet.
At first, I need to register a User for me before creating posts. I click the Register link. Then a form is presented where I am requested to type a credential (username and password pair).
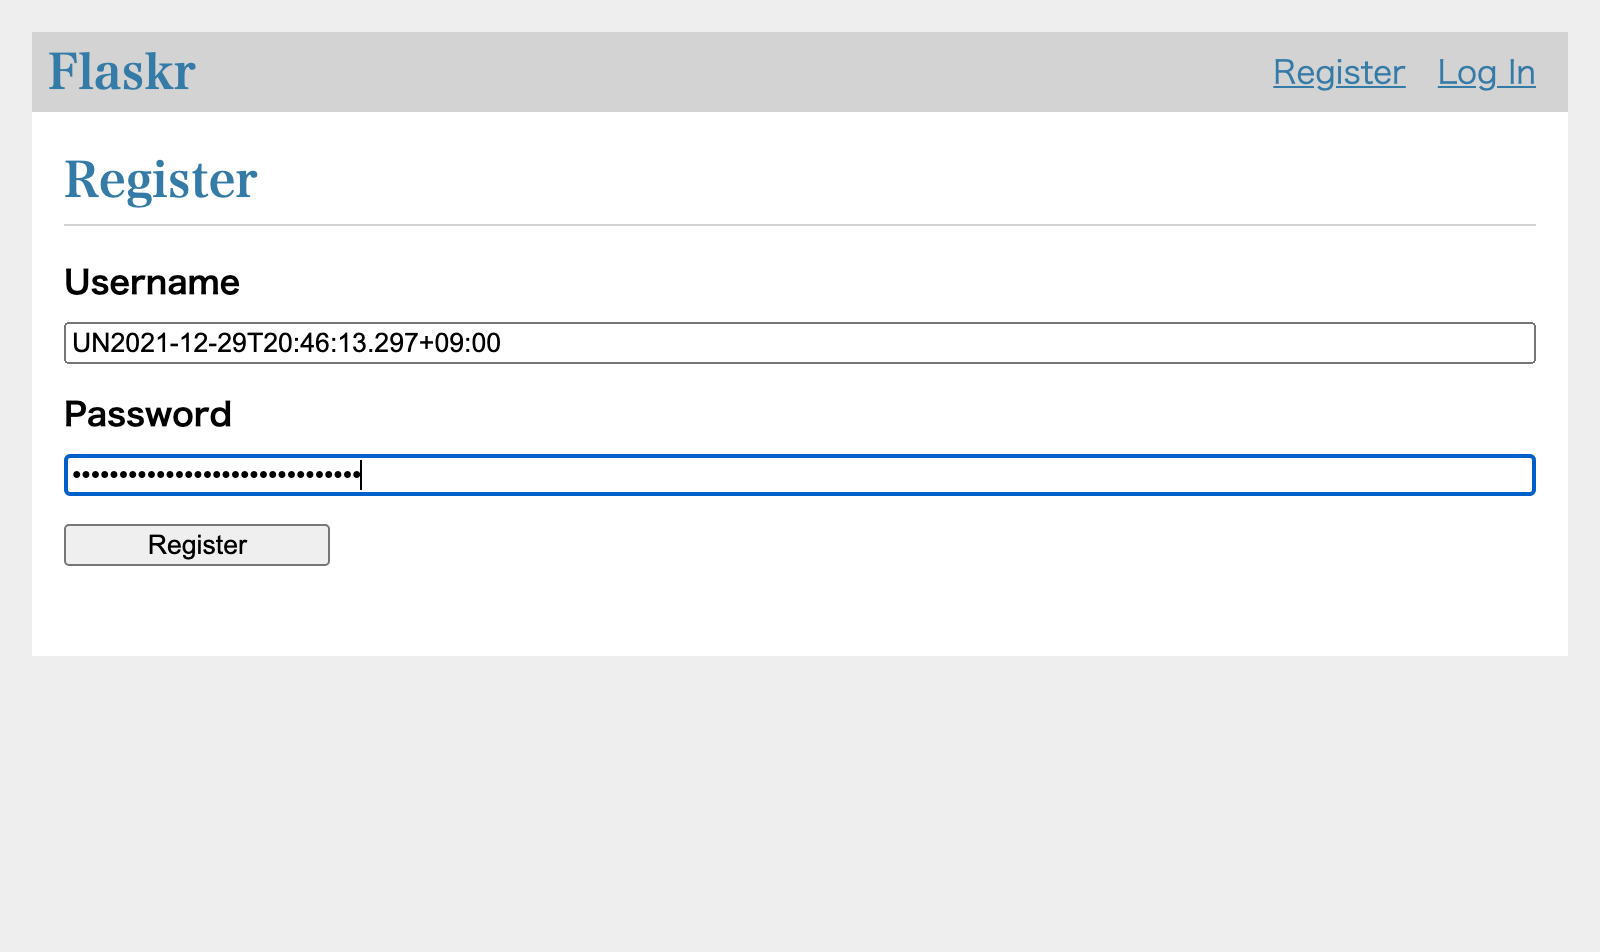
I click the Register button. Then the user will be registered. I am transferred to the Login page.
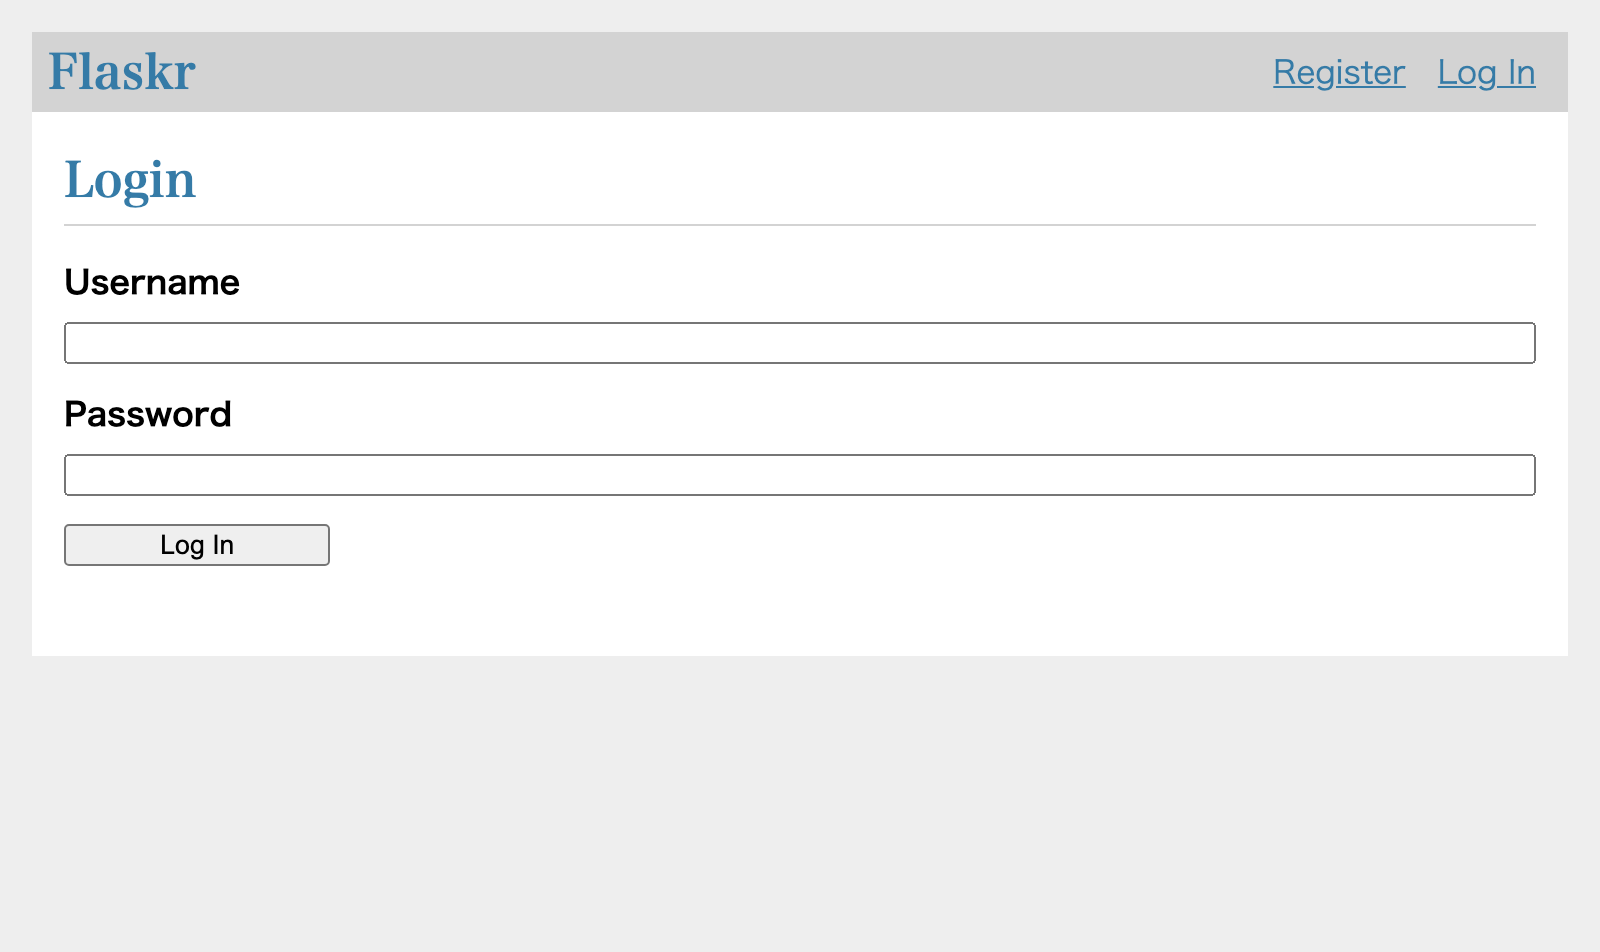
I re-type the credential (username and password) that I used to create my User.
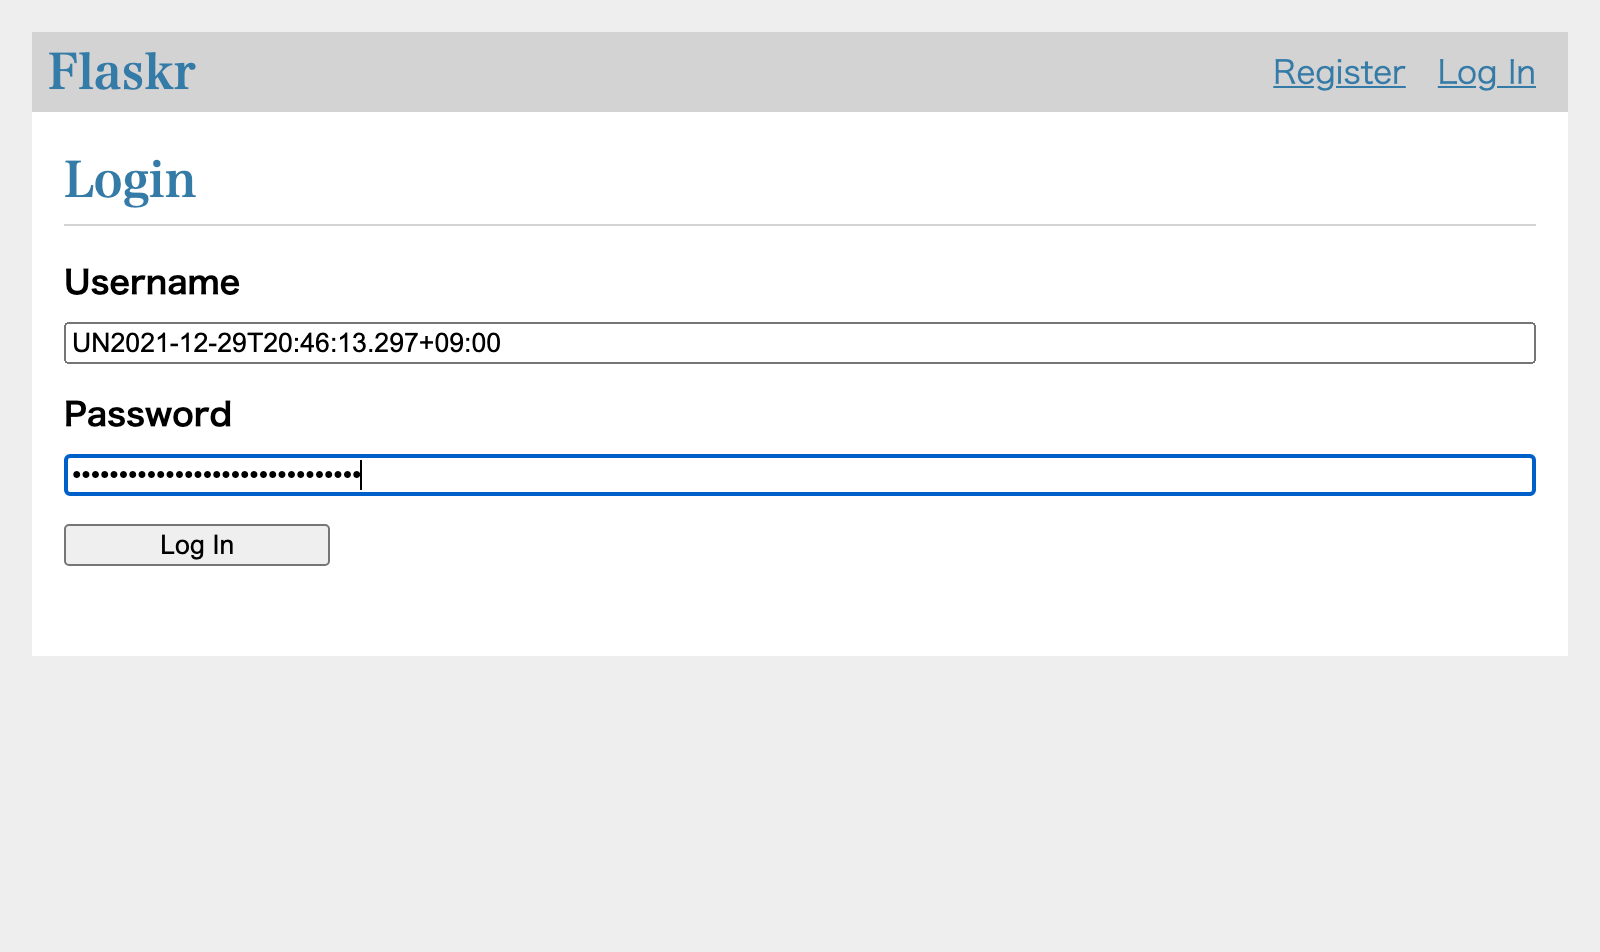
I click the Log In button. Then I am transferred to the Index page. Please note that the username is displayed in the header. This implies that now I am logged into this blog application.

Now I am going to create a new post. I click the New link. Then a empty form is displayed.
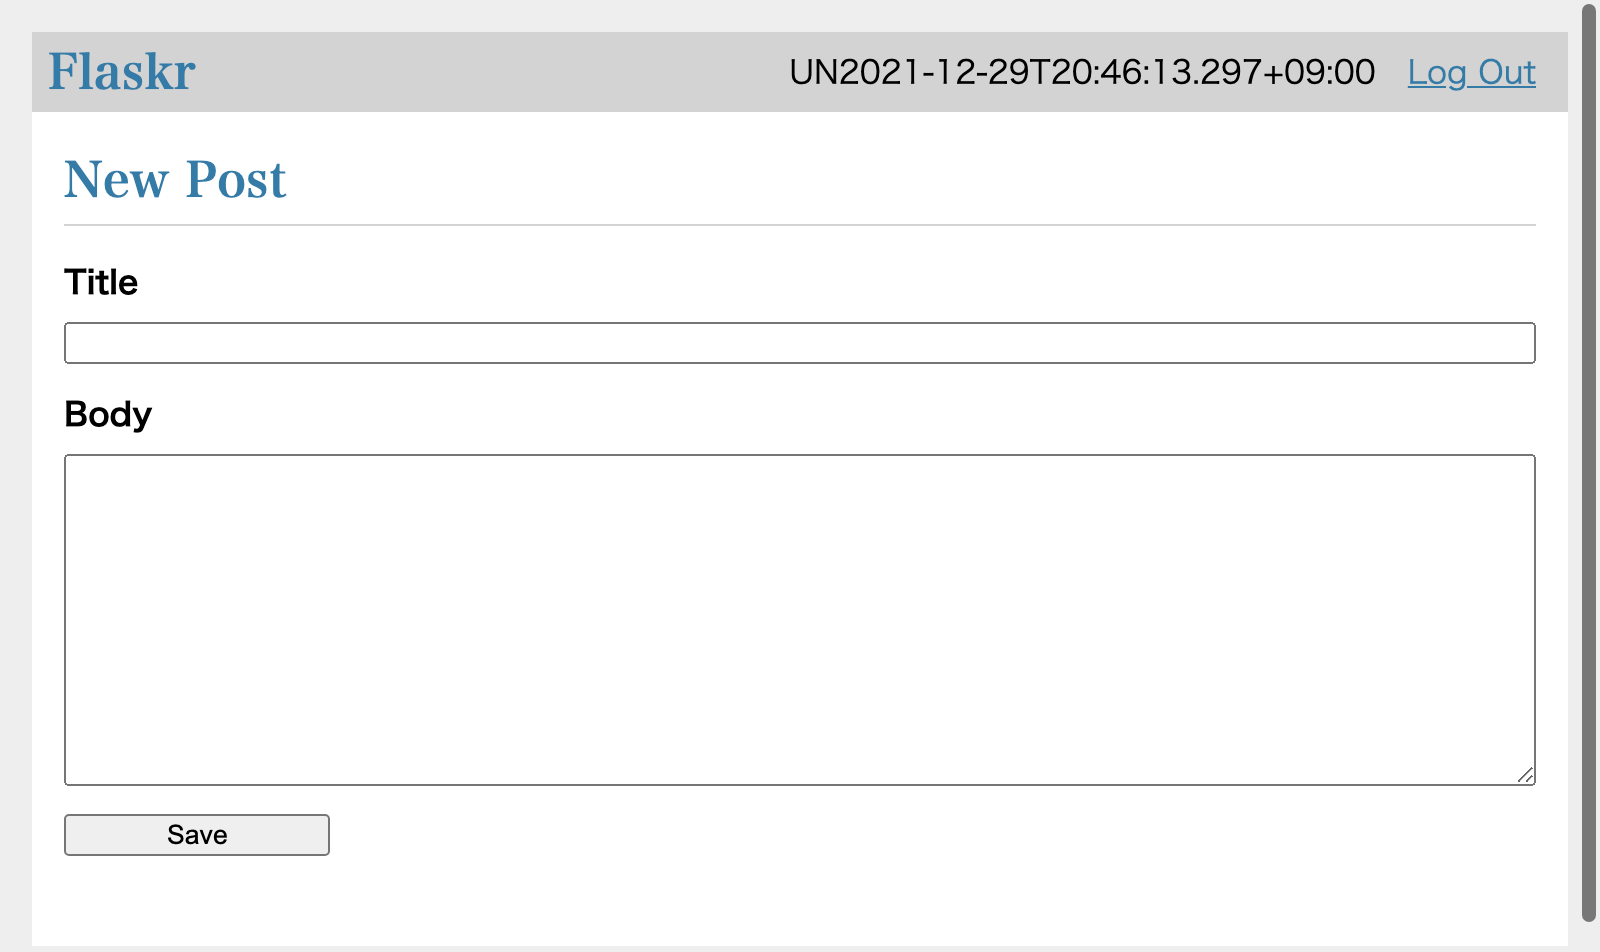
I type texts into the title and body field.
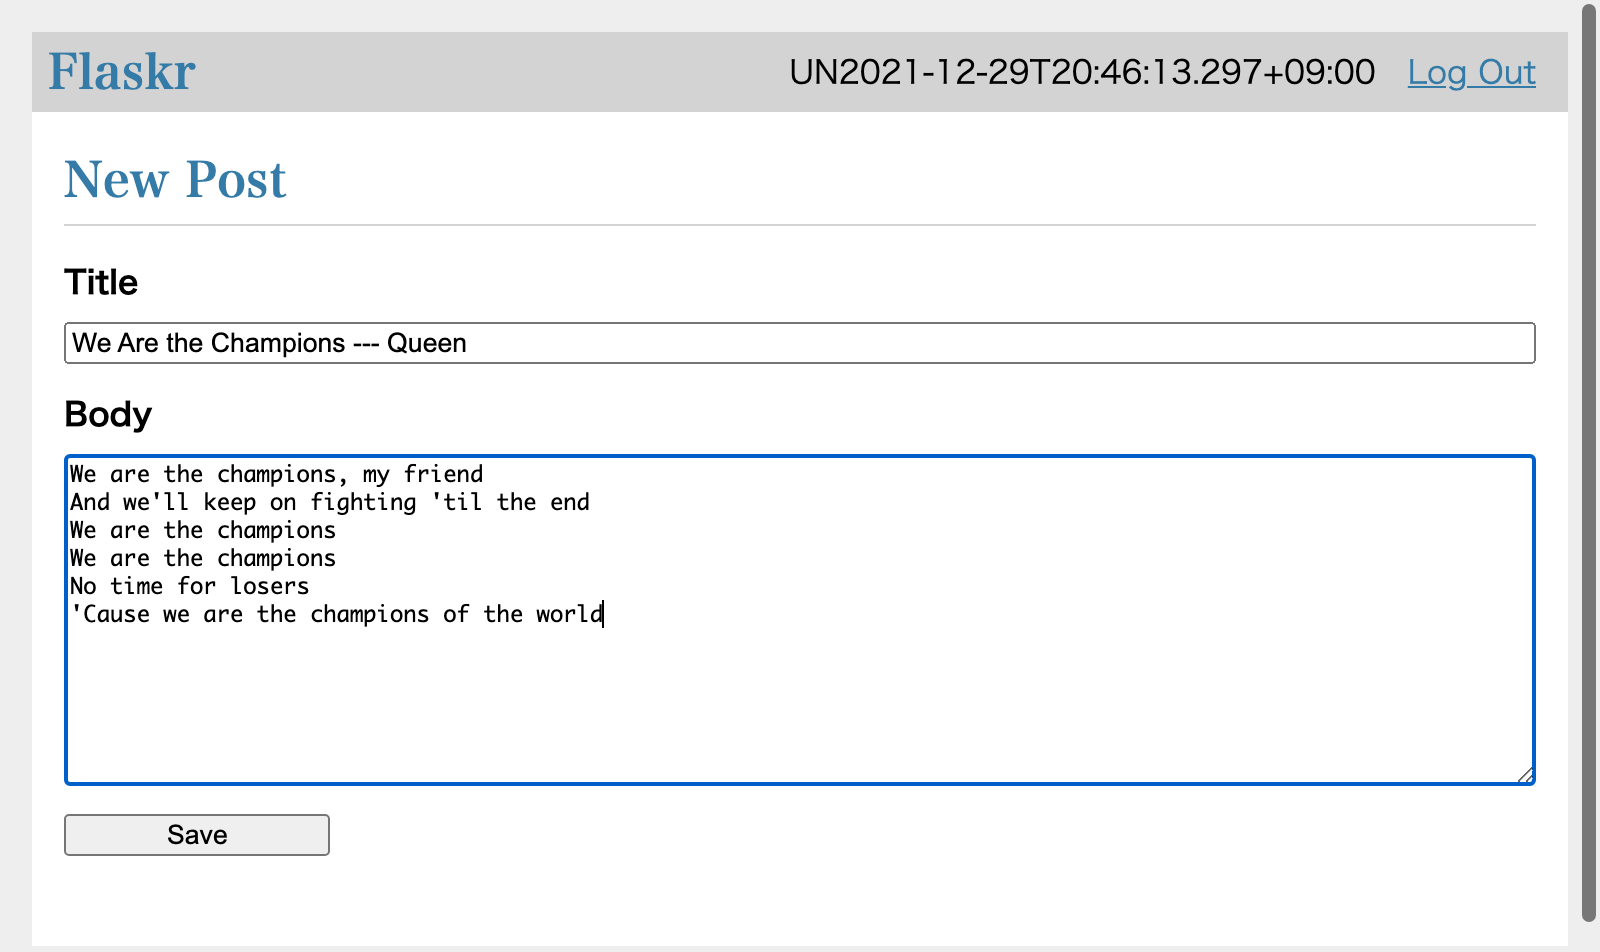
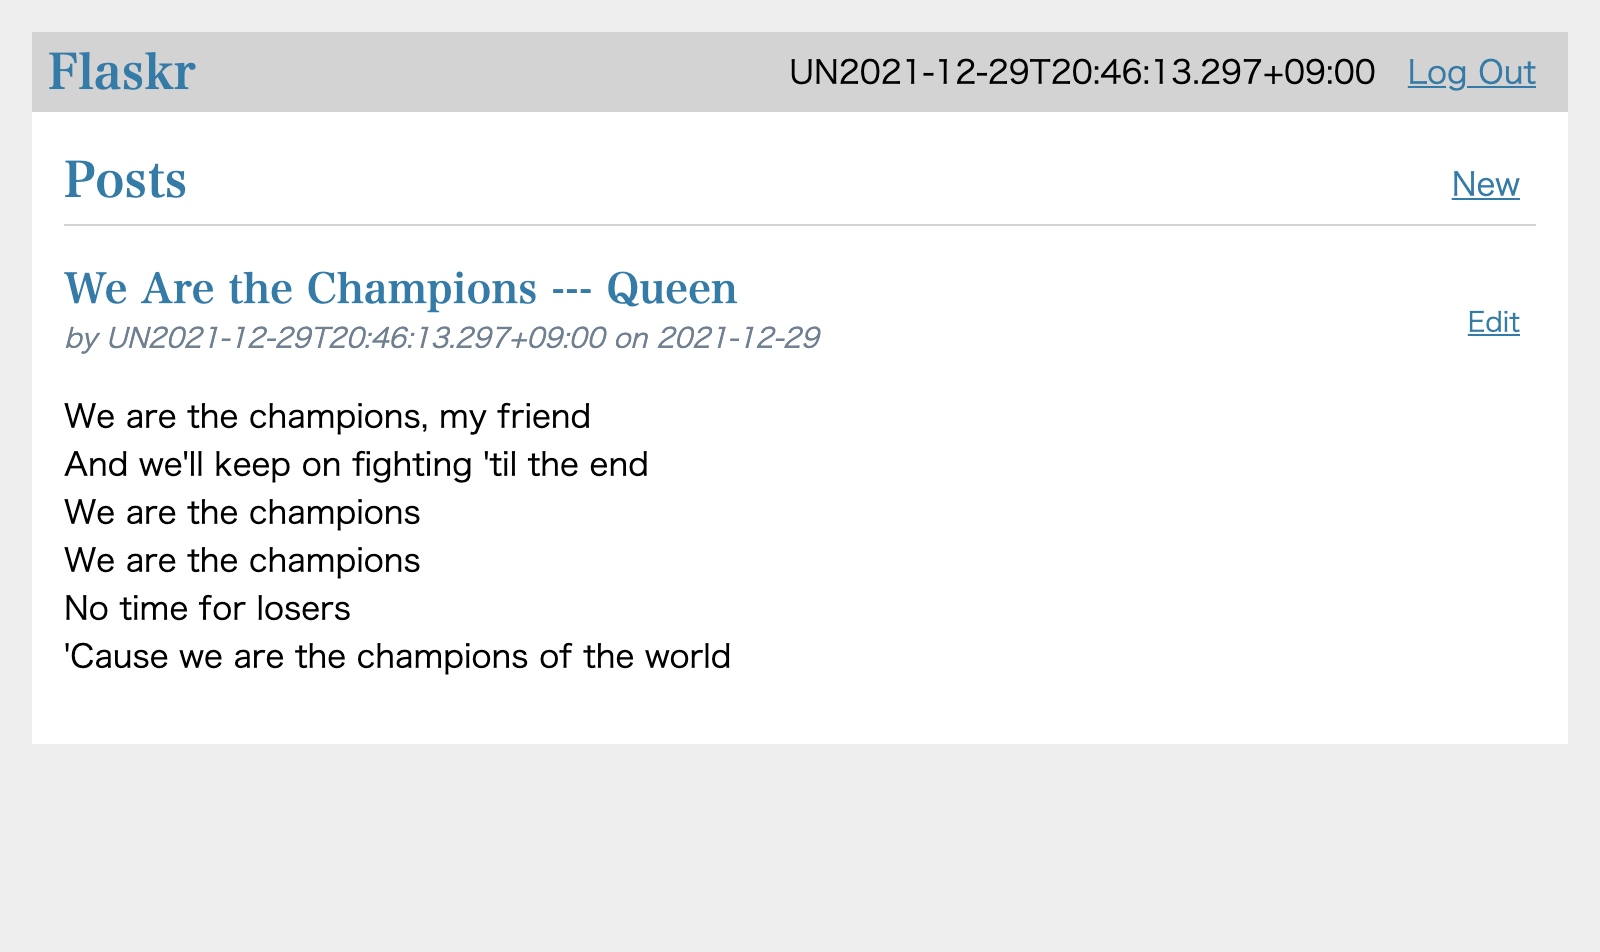
I click the Save button. Then I am transferred to the index page. Please find a post has been saved into the Blob system and is now displayed in the list of posts.
Solution described
Installing docker command
You need the docker command on your own PC. I installed docker command into my Mac Book Air using Homebrew.
$ brew install docker
I checked if the docker command is operational.
$ docker --version
Docker version 20.10.2, build 2291f61
:~
$
Windows users can use “Docker Desktop on Windows”,
Starting up Flaskr server at http://127.0.0.1/
You need a temporary directory with any name.
$ cd ~
$ mkdir flaskr
In the temp directory, you want to execute the docker run command:
$ cd ~/flaskr
$ docker run -it -p 80:8080 --rm kazurayam/flaskr-kazurayam:1.0.3
Serving on http://0.0.0.0:8080
Or, you can use the following shell script in the root directory of this project.
if [ ! -e ./tmp ]; then
    mkdir tmp
fi
cd ./tmp
docker run -it -p 80:8080 --rm kazurayam/flaskr-kazurayam:1.0.3
cd -
Now I can open a browser and visit the following URL.
You can stop the HTTP server by CTRL+C.
Flaskr has an internal database where user credentials and posts are persisted. When Flaskr is stopped and re-started, it clears the database to the initial state.
Flaskr docker image
I made a docker image which is publicly available at Docker Hub :
See MyPythonProjectTemplate (japanese only) how I created this docker image.
Description of codes
Test Cases/flaskr/TC1_open_close
This script opens a Chrome browser using Katalon Studio’s built-in keyword WebUI.openBrowser. It navigates to a URL, verifies if the loaded page is the one expected. This is a typical/simplest test script in Katalon Studio.
import static com.kms.katalon.core.testobject.ObjectRepository.findTestObject

import com.kms.katalon.core.webui.keyword.WebUiBuiltInKeywords as WebUI

WebUI.openBrowser('')
WebUI.navigateToUrl('http://127.0.0.1/')

WebUI.verifyElementPresent(findTestObject("blog/IndexPage/h1_flaskr"), 10)
WebUI.verifyElementPresent(findTestObject("blog/IndexPage/a_Register"), 3)
WebUI.verifyElementPresent(findTestObject("blog/IndexPage/a_Log In"), 3)

WebUI.delay(1)

WebUI.closeBrowser()
Test Cases/flaskr/TC2_register_Alice_then_LogIn
This script does a bit more than TC1_openn_close. It interacts with the “Flaskr” web app.
-
It opens a Chrome browser usig Katalon keyword
WebUI.openBrowser()and navigate to the Flarkr URL. -
It registers a new user “Alice”.
-
It logs in the Flaskr app using the user “Alice”.
import static com.kms.katalon.core.testobject.ObjectRepository.findTestObject

import com.kms.katalon.core.util.KeywordUtil
import com.kms.katalon.core.webui.keyword.WebUiBuiltInKeywords as WebUI
import com.kazurayam.uitestjava.flaskr.pom.data.User

String username = User.Alice.toString()
String password = User.Alice.getPassword()

WebUI.openBrowser('')
WebUI.navigateToUrl('http://127.0.0.1/')

// ensure we are on the index page
WebUI.verifyElementPresent(findTestObject("blog/IndexPage/h1_flaskr"), 10)
WebUI.verifyElementPresent(findTestObject("blog/IndexPage/a_Register"), 3)
WebUI.verifyElementPresent(findTestObject("blog/IndexPage/a_Log In"), 3)

// we want to navigate to the Register page
WebUI.click(findTestObject("blog/IndexPage/a_Register"))

// make sure we are on the Register page
WebUI.verifyElementPresent(findTestObject("auth/RegisterCredentialPage/input_Register"), 3)

// we want to register a user
WebUI.setText(findTestObject("auth/RegisterCredentialPage/input_username"), username)
WebUI.setText(findTestObject("auth/RegisterCredentialPage/input_password"), password)
WebUI.click(findTestObject("auth/RegisterCredentialPage/input_Register"))

// check if the user is already registered
boolean alreadyRegistered = WebUI.waitForElementPresent(findTestObject("auth/RegisterCredentialPage/div_flash"), 3)
if (alreadyRegistered) {
    KeywordUtil.markWarning("usernamee ${username} is already registered.")
    // we are still on the Register page
    // so we want to navigate to the Log In page
    WebUI.click(findTestObject("auth/RegisterCredentialPage/a_Log In"))
}

// now we are on the Login page
// now let us log in
WebUI.verifyElementPresent(findTestObject("auth/LogInPage/input_Log In"), 3)
WebUI.setText(findTestObject("auth/LogInPage/input_username"), username)
WebUI.setText(findTestObject("auth/LogInPage/input_password"), password)
WebUI.click(findTestObject("auth/LogInPage/input_Log In"))

// now we should be are on the index page
// have I successfully logged in?
WebUI.verifyElementPresent(findTestObject("blog/IndexPage/nav_span_username", ["username": username]), 3)

WebUI.closeBrowser()
Test Cases/flaskr/TC3_Alice_and_Bob_interact
This script is coded in the typical style of Katalon Studio’s test case.
This script demonstrates how to perform a Web UI test using 2 browsers in Katalon Studio.
-
This script opens 2 windows of Chrome browser.
-
It interacts with Flaskr app as 2 users “Alice” and “Bob” through each 2 windows.
-
Alice logs in Flaskr, makes a post. The post shows a lyrics of a famous song.
-
Bob logs in Flaskr, makes a post. The post shows a lyrics of another famous song.
-
Alice checks if she finds a post made by Bob in the list of posts in Flaskr.
-
Bob checks if he finds a post mode by Alice.
This script introduces Groovy functions (e.g, def login()) in order to reduce code duplications.
Test Cases/POM/TC4_Alice_and_Bob_interact_POM
This script does exactly the same as flaskr/TC3_Alice_and_Bob_interact. But the code looks quite different. It employs the design pattern Page Object model.
import org.openqa.selenium.Dimension
import org.openqa.selenium.Point
import org.openqa.selenium.WebDriver
import org.openqa.selenium.chrome.ChromeDriver

import com.kms.katalon.core.util.KeywordUtil
import com.kms.katalon.core.webui.driver.DriverFactory
import com.kms.katalon.core.webui.keyword.WebUiBuiltInKeywords as WebUI

import flaskrtest.data.Song
import flaskrtest.data.Songs
import flaskrtest.pages.auth.LogInPage
import flaskrtest.pages.auth.RegisterCredentialPage
import flaskrtest.pages.blog.CreatePostPage
import flaskrtest.pages.blog.IndexPage
import flaskrtest.pages.blog.Post

// preparation for ChromeDriver
String chrome_executable_path = DriverFactory.getChromeDriverPath()
System.setProperty('webdriver.chrome.driver', chrome_executable_path)

// open a Chome browser for Alice
WebDriver browser0 = new ChromeDriver()
layoutWindow(browser0, new Dimension(720, 800), new Point(0, 0))

// open a Chrome browser for Bob
WebDriver browser1 = new ChromeDriver()
layoutWindow(browser1, new Dimension(720, 800), new Point(720, 0))

// Alice logs in
login(browser0, "Alice", "AliceInTheWonderLand")

// Bob logs in
login(browser1, "Bob", "LikeARollingStone")

Song song_of_miyuki = Songs.get(0)
Song song_of_queen  = Songs.get(1)

// Alice makes a post
post(browser0, "Alice", song_of_miyuki)

// Bob makes a post
post(browser1, "Bob", song_of_queen)

// ensure Alice finds the song that Bob posted
finds(browser0, "Alice", "Bob", song_of_queen)

// ensure Bob finds the song that Alice posted
finds(browser1, "Bob", "Alic", song_of_miyuki)

WebUI.delay(1)

// close 2 browsers
browser0.quit()
browser1.quit()

/**
 *
 * @param browser
 * @param username
 * @param password
 * @return
 */
def login(WebDriver browser, String username, String password) {
    // let's start playing on the Flaskr web app
    IndexPage index_page = new IndexPage(browser)
    index_page.load()

    // ensuree we are on the index page
    assert index_page.app_header_exists()
    assert index_page.register_anchor_exists()
    assert index_page.login_anchor_exists()
    assert index_page.posts_header_exists()

    // we want to navigate to thee Register page
    index_page.open_register_page()
    RegisterCredentialPage register_credential_page = new RegisterCredentialPage(browser)

    // make sure we are o the Register page
    assert register_credential_page.register_button_exists()

    // we want to register a user
    register_credential_page.type_username(username)
    register_credential_page.type_password(password)
    register_credential_page.do_register()

    // check if the user is already registered
    boolean alreadyRegistered = register_credential_page.flash_exists()
    if (alreadyRegistered) {
        KeywordUtil.markWarning("usernamee ${username} is already registered.")
        // we are still on the Register page
        // so we want to navigate to the Log In page
        register_credential_page.do_login()
    }

    // - now we are transferred to the Login page
    LogInPage login_page = new LogInPage(browser)
    assert login_page.login_button_exists()

    // Login with the added credential
    // - type credentials and do login
    login_page.type_username(username)
    login_page.type_password(password)
    login_page.do_login()

    // - make sure we are on the index page
    assert index_page.posts_header_exists()
}

/**
 *
 * @param browser
 * @param usernname
 * @param song
 * @return
 */
def post(WebDriver browser, String username, Song song) {
    DriverFactory.changeWebDriver(browser)
    // let's start from the index page
    IndexPage index_page = new IndexPage(browser)
    index_page.load()

    // we want to navigate to the CreatePost page
    index_page.open_create_post_page()
    CreatePostPage create_post_page = new CreatePostPage(browser)
    assert create_post_page.save_button_exists()

    // type title
    String title = song.title + " --- " + song.by
    create_post_page.type_title(title)
    // type body
    String lyric = song.lyric
    create_post_page.type_body(lyric)
    // save the post
    create_post_page.do_save()

    // now we are on the index page
    // make sure that the 1st article is the song just posted by usernname
    Post post = index_page.get_post_latest()
    assert post != null
    assert post.get_title() == title
    assert post.about_text_contains(username)
    assert post.get_body() == lyric
}

def finds(WebDriver browser, String username, String somebody, Song song) {
    DriverFactory.changeWebDriver(browser)
    // let's start from the index page
    IndexPage index_page = new IndexPage(browser)
    index_page.load()
    // find a post by somebody
    List<Post> postsBySomebody = index_page.get_posts_by(somebody)
    assert postsBySomebody.size() > 0
}

/**
 *
 * @param browser
 * @param dimension
 * @param point
 * @return
 */
def layoutWindow(WebDriver browser, Dimension dimension, Point point) {
    browser.manage().window().setSize(dimension)
    browser.manage().window().setPosition(point)
}
For me, the source code of POM/TC4_Alice_and_Bob_interact_POM with POM is easier to understand/maintain/extend than flaskr/TC3_Alice_and_Bob_interact.
Appendix
Asciidoc → Markdown
I wrote the source of this document in Asciidoc format, then convert it into Markdown format using asciidoctor and pandoc.
Asciidoc enabled me to automatically include the latest source codes into the document. No manual copy & paste operation is required. This made my document authoring work productive.
I used a shell script indexconv.sh from .adoc to .md conversion. This script was originally shared at https://github.com/github/markup/issues/1095